
Doc Green’s Woodturning Site

A Clarification
Sometimes, in spite of your best efforts, things go awry. Such is the case for one of the projects in Fixtures and Chucks. Specifically, in the project Turn a Natural-Edge Bowl, on pages 156 -157, a photo (No. 2) got placed out of sequence, and it confuses the whole issue.
To hopefully avoid further confusion by trying to explain what is out of place, and what should go where and with what words, I’m going to reproduce the entire project here. And since I’m no longer under any restraints as far as length is concerned, I may just add an additional photo here and there, mostly just because I can. Here we go.
To hopefully avoid further confusion by trying to explain what is out of place, and what should go where and with what words, I’m going to reproduce the entire project here. And since I’m no longer under any restraints as far as length is concerned, I may just add an additional photo here and there, mostly just because I can. Here we go.
*****************************
Turn a Natural-Edge Bowl 
Turn a Natural-

The completed bowl is shown in the photo at right. The blank came from a limb of an ornamental plum tree. (It’s not the same bowl as the one in the book. I turned another so I could take additional photos.)
Step one. Begin with a length of timber such as a large tree limb. Use a bandsaw or chainsaw to cut a flat on one side of the bl
 ank. Mount it on a faceplate and install it on the lathe. Use the tailstock for support.
 Step two. Keeping in mind that the foot of the bowl will be near the faceplate, rough out the outside profile. This will involve removing the sharp corners on the faceplate side and quite a bit more wood to bring the outside close to the shape you want. Do not work too close to the final surface because the blank must be recentered in step five.

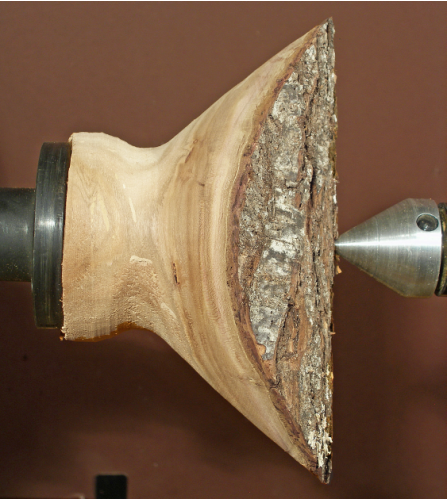
Step three. Pull the tailstock back out of the way.
 Begin hollowing in the region where the tailcenter was. Clean off the bark and prepare a flat place for the drive center to seat, in the following step. Drill a small hole for the point of the drive center to fit into.
 Step four. Remove the piece from the lathe and remove
 the faceplate. Seat a drive center in the hole you drilled at the center of the hollow in the previous step. Install the piece on the lathe, but don’t tighten the tailstock more than just enough to hold the piece while it is rotated by hand.
 Step five. Shift the blank until the wings are balanced. This will entail loosening the tail center and shifting the blank so it seats at a different point. When the wings are balanced and you rotate the piece by hand, the tips of the wings should rotate more or less in the same plane when viewed from the side. The rest of the piece will probably be a bit eccentric, but that doesn't matter. Balancing the wings will ensure that the tips of both wings are at the same height when the completed bowl is placed on a horizontal surface.
Step six. Once the wings are balanced, tighten the
 tailstock to keep the drive center seated. Now, two things: First, turn the outside profile of the bowl to its final shape. Second, square the surface and turn a tenon next to the tail center. Remember to plan for the tenon while shaping the outside profile. Don’t carry the profile too close to the tail center or you may not be able to remove the screw holes where the faceplate was mounted.
  Step seven. You can sand the outside at this point and apply a coat of lacquer sanding sealer if you are going to use a lacquer-
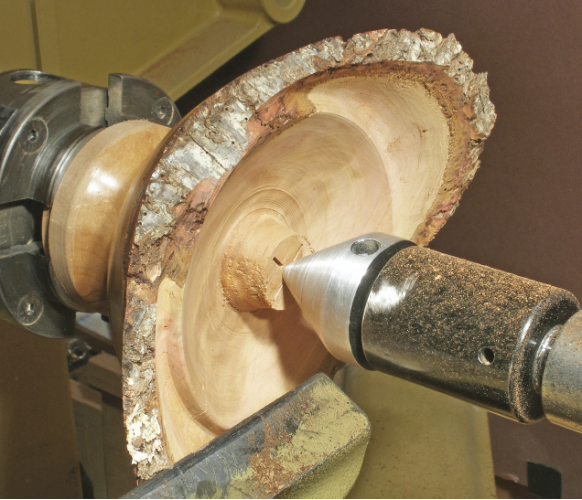
Step eight. Now the real fun begins: you are ready to hollow the inside. It is important to keep the wings uniform in thickness from their tips down to below the lowest point of the rim. If you can do this, the width of the bark will be the same all the way around the bowl. If the wings are thinner near the tips, the width of the bark will be thinner there as well. Complete the hollowing.

Step nine. Use power sanding to sand the interior. Apply sanding sealer if you wish. Remove the piece from the chuck.
Step ten. The final step is to reverse the piece, remove the tenon, and finish the foot. Use an internal jam chuck, one that fits inside the bowl. Turn the tenon down to a small nubbin, then remove the piece from the lathe. Remove the nubbin and finish the foot by hand. And that's it!


