
Doc Green’s Woodturning Site

Measuring Fixture for the Bottom of a Bowl
(An original design)
(An original design)
In turning a bowl, a tenon is usually formed at the base for the jaws of a scroll chuck to grip so the inside can be hollowed. The final step is to reverse chuck the bowl and either remove the tenon completely or modify its shape to form the foot. However, you can ruin the bowl if you accidentally cut through the bottom while removing the tenon.


You can proceed with greater confidence if you know the exact thickness of the bottom in the region of the tenon. This is especially important if you have inadvertently hollowed the bowl a bit deeper than you intended and you want to be sure you can remove the tenon without cutting through the bottom.
The fixture described in this article allows you to measure the thickness to dial-
The Fixture
A frame, made in two parts, forms two shelves. The bowl is centered on the bottom shelf. A dowel rod passes through a hole in the top shelf and makes contact with the inside center of the bowl. The amount the rod is elevated equals the thickness of the bottom of the bowl.


A 1/4-
A washer is positioned on the dowel rod so that the top of the washer is flush with the top surface of the top shelf when the rod is in contact with the end of the adjusting bolt at the bottom. A recess equal to the thickness of the washer is cut in the top shelf.
When a bowl is placed in the fixture, the top of the washer will be r
 aised above the surface an amount equal to the thickness of the bottom. This can be measured with a dial caliper, as shown in the photo.
 This measurement includes the thickness of the tenon. Subtracting the thickness of the tenon from the initial measurement gives the bottom thickness that will remain after the tenon is removed. However, if you plan to make the foot concave rather than perfectly flat, the concavity will reduce the bottom thickness. You must take this reduction into account.
Measuring a completed bowl. You can measure the actual bottom thickness that results from removing the tenon and making the foot slightly concave. Place the bowl on the bottom fixture and then adjust the bolt until it makes contact with the center of the concave foot. You can tell when contact is made by watching for a slight movement of the foot as the adjusting bolt is advanced.
Measure the elevation of the washer and then remove the bowl. Lower the dowel until it makes contact with the end of the bolt. Again, measure the elevation of the washer. Subtract the last measurement from the first to get the thickness at the center of the bowl.
What if ... ? If it turns out that the thickness is not enough to allow the tenon to be removed, you have at least three options. One is to add a decorative foot of contrasting wood. A second option is to consign the bowl to the firewood pile.
Another possibility is to fill in the tenon with an inlay material so the tenon doesn’t have to be removed. This will make a decorative ring at th
 e bottom, which can actually enhance the appearance of the piece. One possibility is to use a mixture of coffee grounds and epoxy, as shown in the following photo.
 Building the Fixture
The construction is straightforward because the frame is made in two parts. As always, adjust the dimensions to suit you
 r needs.
 Step 1: Cut the bottom shelf out of plywood (or other sheet material) at least 1/2” thick. Locate the center of this piece. Draw a series of concentric circles around the center point to aid in positioning the bowl. Drill and tap a hole for a 1/4-
Step 2: Attach supports to the bottom shelf. I used two sections of a pine “2 x 6,” each 8” long. This elevated the bottom shelf 5.5”.
Step 3: Cut out the top shelf. Note that it does not need to be as wide as the bottom shelf. (4” wide is good.) Make it about 1” shorter than the bottom shelf.
Step 4: Select the dowel and washer you intend to use. The hole in the washer should match the diameter of the dowel. (I used a 1/4” dowel.)
Use a Forstner or spade bit to drill the recess for the washer at the center of the top shelf. Don’t worry if you accidentallly get the recess too
 deep; you can compensate by adjusting the length of the dowel in step 9.
Step 5: Drill the hole in the top shelf that the dowel will pass through. Be sure this hole is perpendicular to the top surface. Sand the dowel if necessary so it will slide easily in the hole.
Step 6: Add the block to the underside of the top shelf. This block is to give a greater thickness for the dowel to pass through in the hope that better alignment will be achieved. Drill the hole using a drill press. After drilling the hole, use the bit to align the block with the hole drilled in step 5. Use medium CA or epoxy to glue the block in place. (You can use a shorter block than the 1.5” one I used.)
Step 7: Attach the vertical supports to the top shelf.
Step 8: Glue the washer to the dowel. Place the top shelf on top of the bottom shelf and insert the dowel. Place the top shelf slightly off center so the end of the dowel misses the hole in the bottom shelf. Put thin spacers (1/16” to 1/8”) under each support for the top shelf so the dowel will wind up being a bit too long. Drop the washer over the dowel and tack it in place with a small drop or two of medium CA. Hit the CA with accelerator, then remove the dowel and washer. Apply a small fillet of 5-
Step 9: After the epoxy sets up, remove the spacers and reinsert the dowel into the top shelf. Let it drop all the way down to the bottom shelf. The washer should now be slightly proud of the top surface of the top shelf. Very carefully round off the tip at the bottom of the dowel and adjust its length until the washer is exactly flush with the top surface of the top shelf. Be sure that none of the epoxy applied in the previous step prevents the washer from dropping fully into the recess.
Step 10: Make a suitable knob for the adjusting bolt and then scre
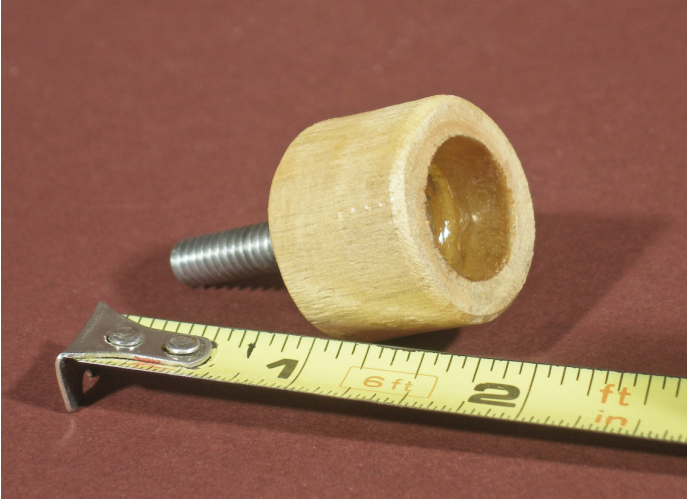 w the bolt into the hole in the bottom shelf.
 Step 11: Cut out the two cleats (see drawing) that keep the top shelf in position on the bottom shelf. Position the top shelf so that the end of the dowel comes to rest on top of the adjusting bolt. Clamp the cleats in position. Remove the top shelf and then install the screws. Place the top shelf in position and see that the dowel properly seats on top of the bolt.
Step 12: Find a bowl and measure the thickness of its bottom. You may be surprised with what you find.
