

Rolling Pin with Rotating Handles
Part 1: Turning the Body
Every kitchen needs a rolling pin. You may forego a food processor, a cheese cutting board, a popcorn popper, or a waffle iron, but you will be working at a big disadvantage if you don’t have a rolling pin.
For a woodturner, a rolling pin is easy to make. It involves only spindle turning,
and if you are so inclined, offers the o pportunity to make and use a couple of mandrels.
Some turners take them to a high level with various designs and enhancements. In
this article I describe the process I use to make a basic, functional rolling pin
with handles that rotate independently of the body.
pportunity to make and use a couple of mandrels.
Some turners take them to a high level with various designs and enhancements. In
this article I describe the process I use to make a basic, functional rolling pin
with handles that rotate independently of the body.
There are three basic designs or types of rolling pins. A French roller is basically
a spindle about 20” long with a taper at each end. A traditional American roller
consists of a cylindrical body of uniform diameter about 11” long which may have
either integral handles or handles that rotate independently of the body. American
rollers typically have a body about 2” to 2.25” in diameter. French rollers are usually
somewhat smaller.
My preference has always been a rolling pin with rotating handles. After many years of pondering, I finally came up with an easy way to make handles that rotate. For this article I will present the design idea first and then give the details further down. That is, I will recite the punch line and then tell the joke.
Easy Rotating Handles
Store-
For a woodturner, the difficulty in making such a rolling pin lies in drilling the
hole through the body. Drill bits typically wander in end-
Here’s the idea. Make a short bushing with a 1/4” hole through the center. Insert a bolt through the bushing. The bolt should turn freely. Screw a handle onto the threads of the bolt, and then epoxy the bushing into a matching hole drilled in the end of the rolling pin body. Done!


Making the Body
The sequence of events is to first true up a blank and form a tenon at each end. Mount the blank in a scroll chuck and drill a 3/4” hole in each end. After the holes are drilled, mount the blank between a mandrel and a cone center and turn to the final dimensions. Finally, remove the tenon at each end.
Two Options for the Tenons
To drill the holes in the center section (on the lathe), we must have a tenon on each end of the blank so it can be held in a scroll chuck. Then, in due course, the tenons must be removed. There are two different approaches to this part of the program, shown in the following diagrams.


Tenons on the side: One way to do it is to begin with a blank that will true up to a diameter somewhat larger than the projected finished diameter. After the blank is true, form a tenon at each end of the blank but make certain that the diameter of the tenon is greater than what the finished diameter is to be. Then, when the piece is turned to its final diameter, the tenons will disappear.
Tenons on the ends: Another way to do it that does not require a blank with as large a diameter is to begin with a blank about 3/4” longer than the final length and form the tenons on the end of the blank. After drilling the holes, remove the tenons. They can be removed (off the lathe) by sawing them off with a table saw, bandsaw, or even a hand saw. In any case, the end surfaces left by the saw will have to be flattened, as described farther down in this article.
Step by step:
1. The body of rolling pins generally range in length from about 10 to 13”. The diameter ranges from about 1.75” (rather small) to perhaps 2.375”. A good place to start is to make the body 10” long and 2.125” in diameter.
Select a blank of appropriate length, depending on whether you are going to place
th e tenons on the end or on the side, as described above. Mount the blank between
centers and true it up, but don’t turn it down to the final diameter. Form a tenon
at each end.
e tenons on the end or on the side, as described above. Mount the blank between
centers and true it up, but don’t turn it down to the final diameter. Form a tenon
at each end.
2. Remove the blank from between centers and remount it between a scroll chuck and
a live center. In this step, the live center is used simply to ensure the blank is
properly aligned in the chuck. Reduce the RPM of the lathe to 400 or less in anticipation
of drilling the holes in the ends of the body.
center is used simply to ensure the blank is
properly aligned in the chuck. Reduce the RPM of the lathe to 400 or less in anticipation
of drilling the holes in the ends of the body.
3. Pull the tailstock back, remove the live center, and install a Jacobs chuck with
a 3/4” drill bit. Drill the hole to a depth o f at least 2” measured from where the
finished end will be. That is, take the width of the tenon into account if the tenons
are on the ends. (For more details on drilling the hole, see the article Drilling
the Hole in a Tool Handle on this site.)
f at least 2” measured from where the
finished end will be. That is, take the width of the tenon into account if the tenons
are on the ends. (For more details on drilling the hole, see the article Drilling
the Hole in a Tool Handle on this site.)
4. After both holes are drilled, mount the blank between a mandrel and a cone center. This centers the body on the holes. Turn the body down not quite to its final diameter because it will be reduced slightly by sanding and leveling the surface. (See the comments below about turning the body to a uniform diameter.)


5. Make a sanding board by wrapping a sheet of sandpaper around a fla t piece of
dimensioned lumber. Sand the surface until all tool marks are gone and until you
cannot feel any high or low spots as you slide your hand along the length. Then use
normal sanding techniques to finish sand the surface.
t piece of
dimensioned lumber. Sand the surface until all tool marks are gone and until you
cannot feel any high or low spots as you slide your hand along the length. Then use
normal sanding techniques to finish sand the surface.
6. Remove the tenon at each end − if you chose the option of putting them at the ends rather than on the side.
7. Clean up the end. Depending on the method you used to cut the blank to length or how you removed the tenon in the previous step, the ends of the blank may have saw marks or torn grain. Take a fine cut across the end to clean it up. I typically use a 3/8” spindle gouge for this task, one with a fingernail grind, and make a shearing cut with the bottom wing.


8. Reverse the body and repeat for the other end. After the tenons are gone,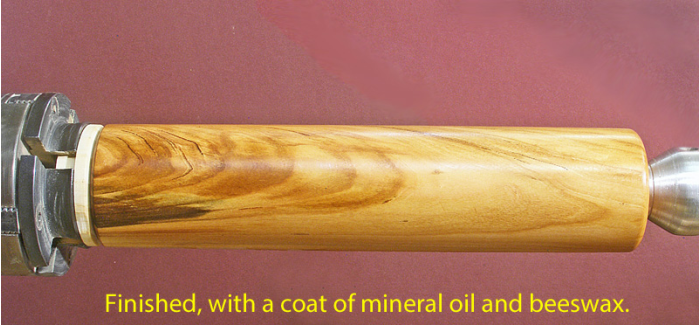 you
can apply the first layer of finish, assuming you are going to use an oil and wax
finish, which I suggest.
you
can apply the first layer of finish, assuming you are going to use an oil and wax
finish, which I suggest.
9. Finally, remove the body from the lathe and use a box cutter or other sharp knife
to cut a small chamfer a round the hole on each end. During assembly, when the bushing
is being epoxied into the body, this chamfer provides a place for excess epoxy to
collect instead of being pushed out onto the end of the body where it may bond with
the handle.
round the hole on each end. During assembly, when the bushing
is being epoxied into the body, this chamfer provides a place for excess epoxy to
collect instead of being pushed out onto the end of the body where it may bond with
the handle.
Comments: Turning the body to a uniform diameter
Many turners use a caliper and a parting tool to make narrow cuts along a spindle to indicate the target diameter at the location of the cuts. That doesn’t work for me.
For one thing, I’m afraid to stick the legs of the caliper into the narrow slot while the lathe is running. (A friend got three broken fingers when the caliper grabbed, and he “had done it a thousand times” before.) Further, the parting tool leaves a rough surface, and by the time I get the surface cleaned up, I’ve erased any benefit of making the cut.
From the initial stages of truing the blank, I try to maintain a close-
I locate the region having the largest diameter and set the caliper. I then move it along the length and observe the gap between the caliper jaws and the surface to get an idea of how close I am to a uniform diameter. After lowering the high spots, I check it again. Only two or three repetitions of this are usually required before it’s “good enough” to move on. For me this means that there are no discernable bumps and the taper amounts to less than about 1/32” over the length of the blank.
A bump that is only an inch or so wide is far more noticable than a gentle taper from one end to the other. Keep in mind that if it looks good and feels good, it probably is good.
For fine tuning the diameter as described, I typically use a sharp scrape r in the
shear-
r in the
shear-
Always make haste slowly: if you overcorrect a high spot and dig a hole, you will
have to re-
A trick: find the high spots quickly.
Here’s another tip, this one to aid in locating the high spots in step 4 above: I discovered that the flat bottom of a black plastic box (Bakelite) will mark the high spots when it is briefly pressed against the rotating blank. The marking becomes less effective when the diameter is nearly uniform, and this in itself indicates the progress you are making. (The box, roughly 4” x 6”, was intended to be an enclosure for an electronic circuit.)


Power Sanding the Body
A sanding pad mounted on a drill can be quite effective in finish sanding the body, but I’ve found a couple of details to be quite important for the process to go smoothly.
To avoid getting flat spots, you must keep the pad moving and with the lathe running at a low RPM. Keep the disk flat against the wood. You can dig a trench if you tilt the pad so that the abrasive contacts the wood only at the edge of the disk.
In the following diagrams, note the line on the disk where it is applied to the wood. Also, notice that if the disk is applied to the top of the workpiece, the lathe must be switched to Reverse to avoid having the disk “grab” and be pushed toward you rather abruptly. This is not a major issue but it is not at all “smooth.” If your lathe does not have Reverse, apply the disk to the bottom of the workpiece.


